Give the story a clear direction
Open Production in the workspace where you want to make the project. Describe who or what the video follows, what changes during the story, and how it ends. Include the intended mood and any details that must stay consistent.
For example: a small white dog appears at an enormous scale in a city, notices the people below, and gently moves on. This gives the sequence an action and an ending, rather than only a visual style.
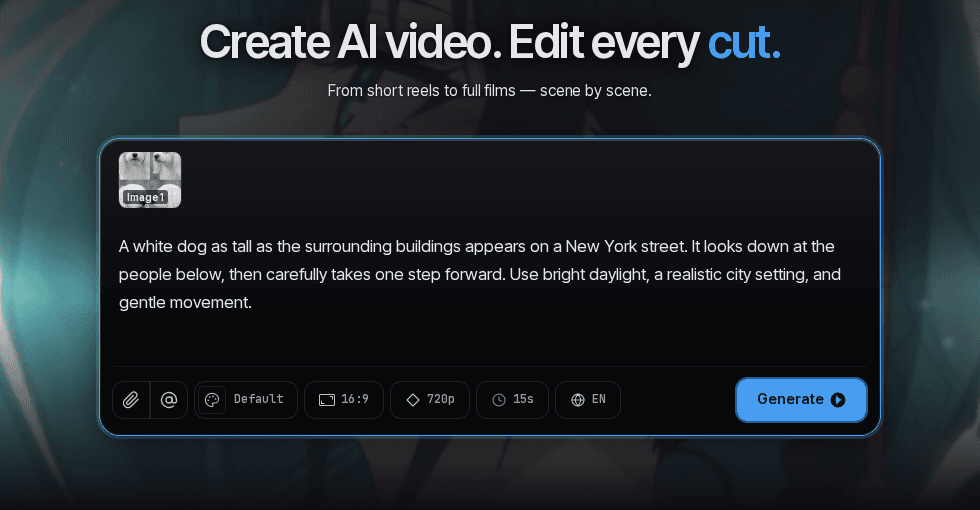
Attach and check your material
Add references
Attach the images or documents you want the project to use. Use an image mention where you need to connect a particular image to the brief.
Check processing
Wait for the material to finish processing. An uploaded file is not necessarily ready for the scenario to use.
Review the choices
Check the available project settings and the estimate shown for this request. Available inputs and limits depend on the current account and model.
Create the scenario
Confirm the request, then review the resulting scenario and elements before moving on to video generation.
If the request needs another try
Read the specific reason shown before submitting again. Check restored text and attachments, correct the input that caused the problem, and review a new estimate if the previous one has expired.
Do not submit repeatedly while the first request is still being processed. Once the scenario is available, continue with its review rather than creating a second project to change one detail.